Camera in Animation: Mastering Visual Storytelling
Learn expert camera techniques in animation with iAnimate! Student Rebecca Liu shares key insights on shots, angles, and movements for powerful storytelling.
Article by Richard Arroyo & iAnimate Student Rebecca Liu
Working with cameras in animation is one of the most powerful ways to bring life and emotion to your scenes. Just like a cinematographer crafting the perfect shot in a live-action film, animators must understand how to use camera movement, composition, and staging to tell their story effectively. Whether you're creating an intimate character moment or an epic action sequence, mastering camera work will elevate your animation from simple movement to compelling visual storytelling.
Introduction to the Camera in Animation
Ever wondered why some animated scenes just hit differently? It's not always about the character movement - sometimes it's all about how we see it.
The role of the camera in animation is like being the audience's eyes and heart at the same time. Think about your favorite animated movie moment - maybe it's when the camera swoops down from the clouds in “How to Train Your Dragon” or that intimate close-up in Up that made you tear up. There is so much creativity that can be expressed through the camera, and when it's done right, it gives the audience chills and an unforgettable experience.
Here's the thing about camera work - it's not just about pointing and shooting. Every angle and every movement tells part of your story. When you're zoomed in tight on a character's face, you're letting the audience feel their emotions. When you pull back wide, you show them how big (or small) your character is in their world.
Let me share something I learned early on - animation isn't just about making things move. It's about making people feel. Like when you're doing a chase scene, a shaky camera adds excitement. Or when your character is sad, a slow push-in makes the moment more powerful. Camera composition is an area that I was always intrigued by and wanted to learn as a filmmaker.
The cool part? Camera techniques in animation give us more freedom than live-action. Want to do an impossible camera move through a keyhole? In animation, you can! Need to show a scene from inside a coffee cup? No problem!
Some simple but powerful camera moves to remember:
- Looking up at your character makes them seem powerful
- Looking down can make them feel small or vulnerable
- A Dutch angle (when the camera's tilted) can make everything feel unstable
- Steady shots help the audience feel safe and grounded
But learning the basics piqued my interest in digging deeper, highlighting how foundational techniques spark curiosity. Remember - every camera choice is really a storytelling choice. Whether you're working on your first shot or your hundredth, think about what your camera is telling your audience to feel.
Want to level up your animation camera work? Start by watching your favorite animated films with the sound off. Just focus on how the camera moves and what each shot makes you feel. That's where the magic starts. If you’re eager to dive deeper, platforms like iAnimate.net offer structured online animation training to help you refine those techniques—perfect for anyone looking to sharpen their skills and understand the craft behind compelling camera storytelling.
Basic Camera Shots and Their Uses in Animation
Hey there! Let's break down camera shots in a way that makes sense. You know that feeling when you're staring at your scene and thinking "Something's just not right"? Often, it's about picking the right shot.
Think of camera shots as different ways to tell your friend about something cool you saw. Each one tells the story a bit differently.
Let's walk through the must-know shots:
The Scene-Setters
- Establishing Shot (EST): Like opening a storybook - shows where everything's happening
- Wide Shot (WS): Shows your whole character plus their world
- Very Wide Shot (VWS): When you need to show even more of the world
- Extreme Wide Shot (EWS): Perfect for those "wow, look how big this is" moments
The Character Shots
- Full Shot (FS): Gets your whole character in frame, head to toe
- Medium Shot (MS): Like talking to someone at a coffee table - shows from waist up
- Medium Long Shot (MLS): A bit further back than the medium shot
- Two-Shot: Great for conversations - fits two characters in one frame
The Detail Shots
- Close-Up (CU): When you want to show those emotions on your character's face
- Medium Close-Up (MCU): Shows from the chest up - perfect for dialogue
- Extreme Close-Up (ECU): Gets right in there - great for those intense emotional moments
The Special Ones
- Over-the-Shoulder (OSS): Makes the viewer feel like they're part of a conversation
- Point-of-View (POV): Shows exactly what your character sees
- Cutaway: When you need to show something else happening
- Cut-In: For showing important details - like a hand grabbing something
Here's a pro tip: The placement of the camera should correspond to the most important thing you want to show at that moment, and what feeling you want to convey. It's nice to have fancy camera moves from time to time, but the objective shouldn't be solely to show a fancy camera move - it should be to sell the emotion.
Remember when you're planning your camera in animation sequence - think about what you want your audience to feel, not just what you want them to see. Each shot is a tool in your storytelling toolkit.
Want to practice? Pick a simple scene - maybe just a character picking up a coffee cup. Try shooting it three different ways. You'll be amazed at how different shots can make the same action feel completely different.
Just starting? Focus on mastering the basic shots first. You can create amazing scenes with just establishing shots, medium shots, and close-ups. The fancy stuff can come later!
Basic Camera Movements in Animation
Ever get stuck trying to make your scenes more dynamic? Camera movement can be your secret weapon, and it's not as tricky as you might think!
Let's break down the essential camera moves that'll make your animation come alive.
Pan - The Side-to-Side Move
- Like following a cat walking across a window sill
- Great for revealing new parts of your scene
- Helps connect different elements in your world
- Pro tip: Keep it smooth and steady unless you're going for a specific effect
Tilt - The Up-and-Down Look
- Perfect for showing how tall something is
- Like when your character looks up at a giant robot
- Can create suspense by slowly revealing something
- Remember: Slower tilts feel more dramatic
Zoom - Getting Closer or Further
- Brings focus to important details
- Can create tension or release
- Think of that classic "realization moment" zoom-in
- A quick tip: Don't overdo it - a little zoom goes a long way
Follow Shot - The Tag Along
- Tracks your character as they move
- Makes the audience feel like they're part of the action
- Great for chase scenes or walking conversations
- Remember to keep some space in front of where your character's heading
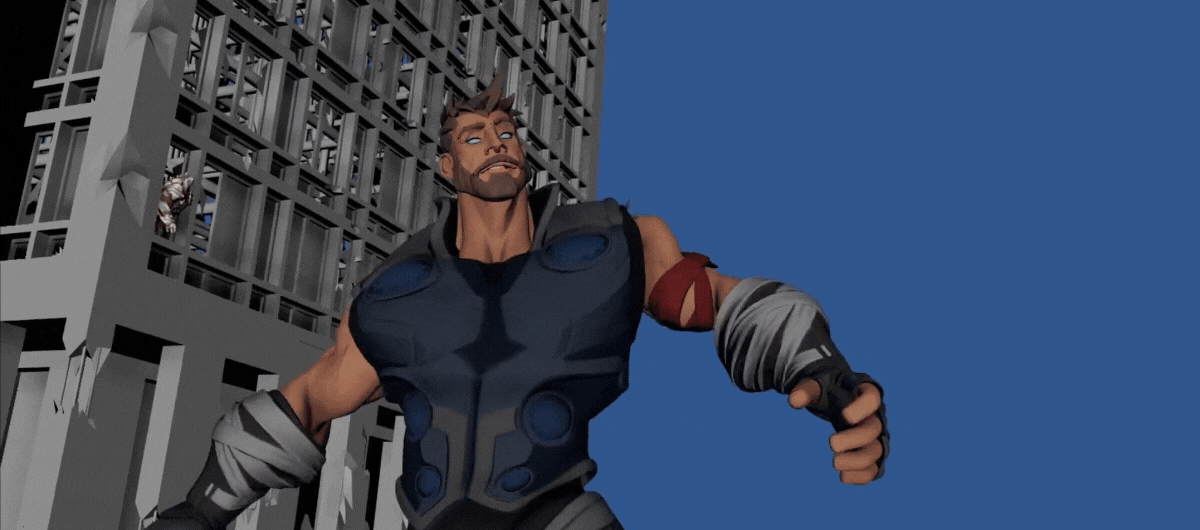
Here's something cool I learned: Moving the camera along with the character can be very helpful in reframing the character during certain moments, and solves problems with on-screen choreography, especially when many characters exist in the shot.
Want to practice the camera in animation movements? Here's a fun exercise:
- Pick a simple object like a coffee cup
- Try showing it with each type of movement
- Notice how each move makes you feel different about that same cup
Remember - just like in real life, not every moment needs movement. Sometimes a still camera can be just as powerful as a moving one. The key is thinking about why you're moving the camera. Is it following the action? Revealing something new? Creating a feeling? Let that guide your choice.
And hey, if you're just starting out, master one move at a time. Your animations will thank you for it! Want to see these in action? Next time you watch your favorite animated film, pay attention to how they move the camera. You'll start noticing these basic moves everywhere!
Camera Angles and Their Effects in Animation
Ever wonder why some scenes make you feel powerful while others make you feel small? It's all about those camera angles! Let me walk you through the different angles we use in animation and what they do to your brain:
Eye-Level - The Natural View
- This is how we normally see the world
- Makes everything feel normal and comfortable
- Perfect for dialogue scenes
- Like chatting with a friend across the table
High Angle - Looking Down
- Makes characters feel smaller or weaker
- Great for showing when someone's feeling defeated
- Think of Simba in that gorge scene - looks tiny!
- Remember: The higher up you go, the more vulnerable they seem
Low Angle - Looking Up
- Makes things look big and powerful
- Perfect for hero moments
- Like when you first see a superhero take off
- Creates instant drama and importance
Bird's Eye - The Top-Down View
- Shows the whole scene from above
- Great for showing layouts or paths
- Makes characters look like tiny pieces in a bigger world
- Think of those classic Pixar establishing shots
Dutch Tilt (Slanted) - The Wobbly One
- When you want things to feel off-balance
- Perfect for tense or uneasy moments
- Makes the whole world feel a bit wrong
- Use sparingly - it's powerful stuff!
Here's a cool trick I learned: The camera is like a character, treat it like one in your shot. It can hesitate, it can get close to the character when it wants to see how the character is feeling up close, and it can pull away from the character to take in his/her magnitude.
Quick example: A character picking up a coffee cup
- Eye-level: Just a normal morning
- Low angle: This is the most important coffee ever
- High angle: Your character's having a rough day
- Dutch tilt: Something weird is about to happen with that coffee
Remember - every camera in animation angle choice tells part of your story. Think about what you want your audience to feel, then pick your angle to match. Just starting? Master eye-level shots first, then experiment with the others. Like learning to walk before you run!
Want to level up? Watch your favorite animated movies and spot these angles. Once you start noticing them, you can't un-see them!
Implementing a Camera in Animation Software
Feeling overwhelmed about using cameras in your animation software? Don't worry - we've all been there! Let's break it down into bite-sized pieces that make sense.
Getting Started with Your Camera
- First things first: Enable that camera tool
- Think of it like picking up a real camera
- Start with a simple setup - no need to get fancy yet
- Practice moving it around to get comfortable
Basic Camera Controls
- Zoom: Get closer or further from your scene
- Rotate: Spin around your subject
- Pan: Move side to side
- Remember: Smooth movements are your friend!
Cool Camera Tricks
- Try the Parallax Effect
- Makes your background move differently than your foreground
- Adds instant depth to your scene
- Like looking out a car window!
Working with Layers
- Lock important layers to your camera
- Keep track of what moves with the camera
- Think of it like different pieces of glass with drawings on them
Making Things Interactive
- Add simple camera movements first
- Test how it feels
- >Adjust the timing until it's just right
Here's a real-world tip: When I first started with a camera in animation, I would practice by creating a simple scene - just a character and a box. Move your camera around it. See how different angles change how it feels.
Quick Troubleshooting Tips
- Camera moving weirdly? Check your anchor points
- Scene looking blurry? Double-check your zoom settings
- Movement too jerky? Try adding more frames
Remember: Your first camera moves don't need to be perfect. Start simple, like following a bouncing ball. Then build up to the fancy stuff!
Want to practice? Try this:
- Set up a simple scene
- Add your camera
- Try one movement at a time
- Save different versions as you go
The secret sauce? Take your time. Even the pros had to start somewhere with their camera work!
Bonus tip: It's very helpful to watch lots of movies/game cinematics and look at shots that inspire you, and to try and incorporate some of the camera work that you like into your own work, but adjust according to your shot's needs, and add a personal flair to it and make it your own.
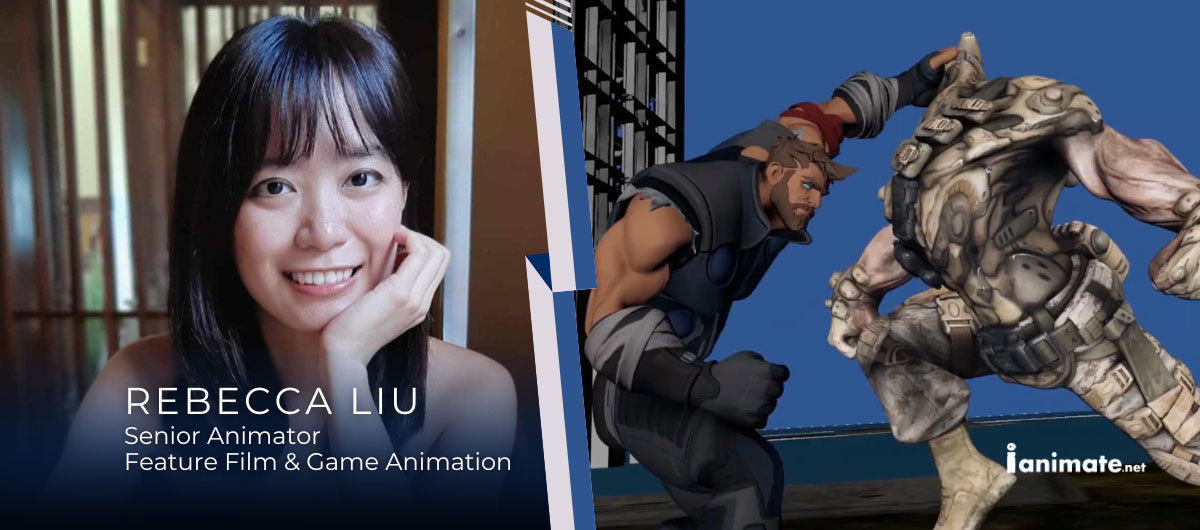
Rebecca Liu on Camera Work as Emotional Storytelling
Rebecca Liu
Senior Animator | Feature Film & Game Animation
"The camera is like a character in your shot. It can hesitate, get close to convey emotion, or pull away to emphasize magnitude. When it all comes together, it’s pure magic."
Background & Journey
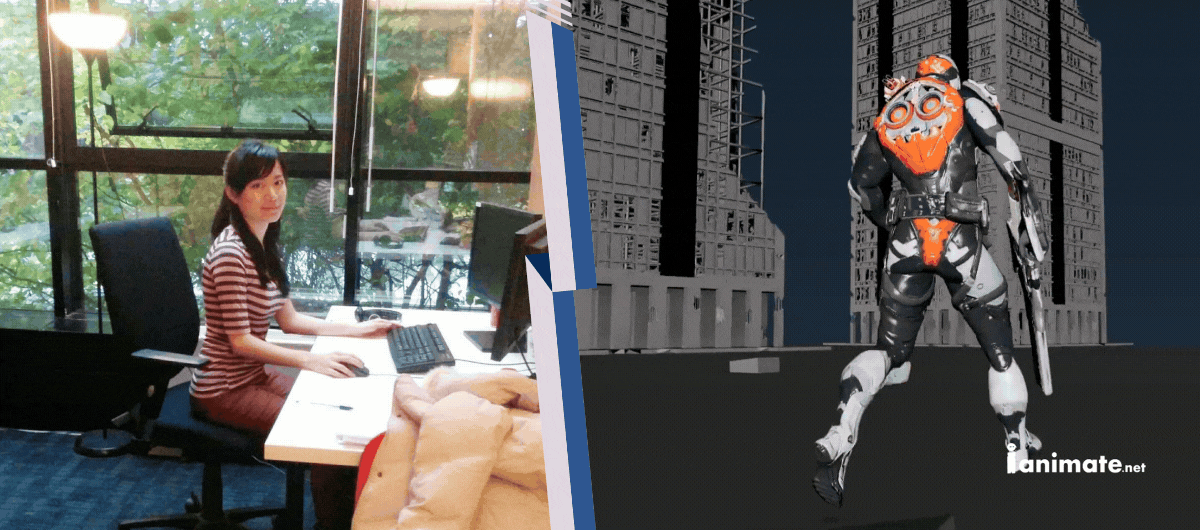
Rebecca Liu is a seasoned animator whose career bridges the prestige of feature films and the dynamic world of game animation. Beginning as an intern at Pixar, she honed her craft in storytelling and character performance before contributing to several acclaimed films at Illumination Studios Paris. However, her passion for animating combat sequences and a desire to tackle technical challenges led her to explore game animation.
Transition to Game Cinematics
Seeking to expand her skill set beyond feature films, Rebecca immersed herself in in-game cinematics—a discipline she describes as an "all-in-one package" blending body mechanics, action choreography, camera composition, and technical problem-solving. Unlike feature animation, where camera work is managed by a dedicated layout department, Rebecca embraced the hands-on challenge of controlling the camera herself, transforming her vision into cohesive, interactive storytelling.
Learning the Language of the Camera
Though initially inexperienced with camera composition, Rebecca’s curiosity drove her to enroll in Ricky Wood’s game animation course, where she gained foundational expertise in camera workflows and purposeful shot design. She reflects:
"In features, animators work with camera setup less frequently. But in games, it’s your tool to guide emotion. Ricky’s lessons on framing, movement, and intent were a revelation."
Key Takeaways from Ricky’s Course
- Inspiration with Intent: Study cinematic shots from films and games, but adapt them to serve your story’s unique needs.
- Camera as Storyteller: Use movement (e.g., tracking characters during combat) to solve choreography issues and maintain focus.
- Emotion Over Flash: Fancy camera moves should amplify feelings, not distract. A close-up of a character’s hesitation can speak louder than a sweeping crane shot.
On Creative Problem-Solving
Rebecca’s first in-game cinematic project began as a jumble of ideas. She admits:
"I had no idea how to piece it all together. But breaking it down—shot by shot, emotion by emotion—taught me how the camera stitches chaos into clarity."
Final Thoughts
For Rebecca, mastering the camera has been a gateway to unforgettable storytelling:
"When the camera clicks with the action—when it gives the audience chills—that’s the thrill. It’s not just about what’s on-screen; it’s about how you make people feel."
Rebecca’s journey underscores the power of curiosity and the artistry hidden in every frame. Follow her work to see how a feature-film animator redefines combat and emotion through the lens of game design.
"I gained hands-on experience with industry-standard animation workflows and received direct feedback from top professionals.”
[Rebecca's Current Reel]
FAQs (Frequently Asked Questions)
Q1: Why is camera work important in animation?
A: Camera work in animation is crucial because it guides viewer attention, creates emotional impact, and enhances storytelling. Just like in live-action films, camera choices determine how audiences experience and connect with scenes, from establishing shots that set the scene to close-ups that convey character emotions.
Q2: What are the most essential camera shots every animator should know?
A: The most essential shots are:
- Establishing Shot (EST) for setting the scene
- Medium Shot (MS) for dialogue and general action
- Close-Up (CU) for emotional moments
- Wide Shot (WS) for showing environment context
- Two-shot for character interactions
Q3: What basic camera movements should I master first?
A: Focus on mastering these fundamental movements:
- Pan (horizontal movement)
- Tilt (vertical movement)
- Zoom (moving closer or further)
- Follow shot (tracking a subject) These form the foundation for more complex camera work.
Q4: How do different camera angles affect the viewer's perception?
A: Camera angles create specific psychological effects:
- Eye level creates a neutral, natural feeling
- Low angles make subjects appear powerful or intimidating
- High angles make subjects seem vulnerable or small
- Dutch tilts create unease or tension
Q5: What's the best way to start practicing camera work in animation?
A: Start with these steps:
- Begin with simple scenes and basic movements
- Practice one type of shot or movement at a time
- Study your favorite animated films with the sound off
- Experiment with filming the same action from different angles
- Get comfortable with your animation software's camera tools before attempting complex shots