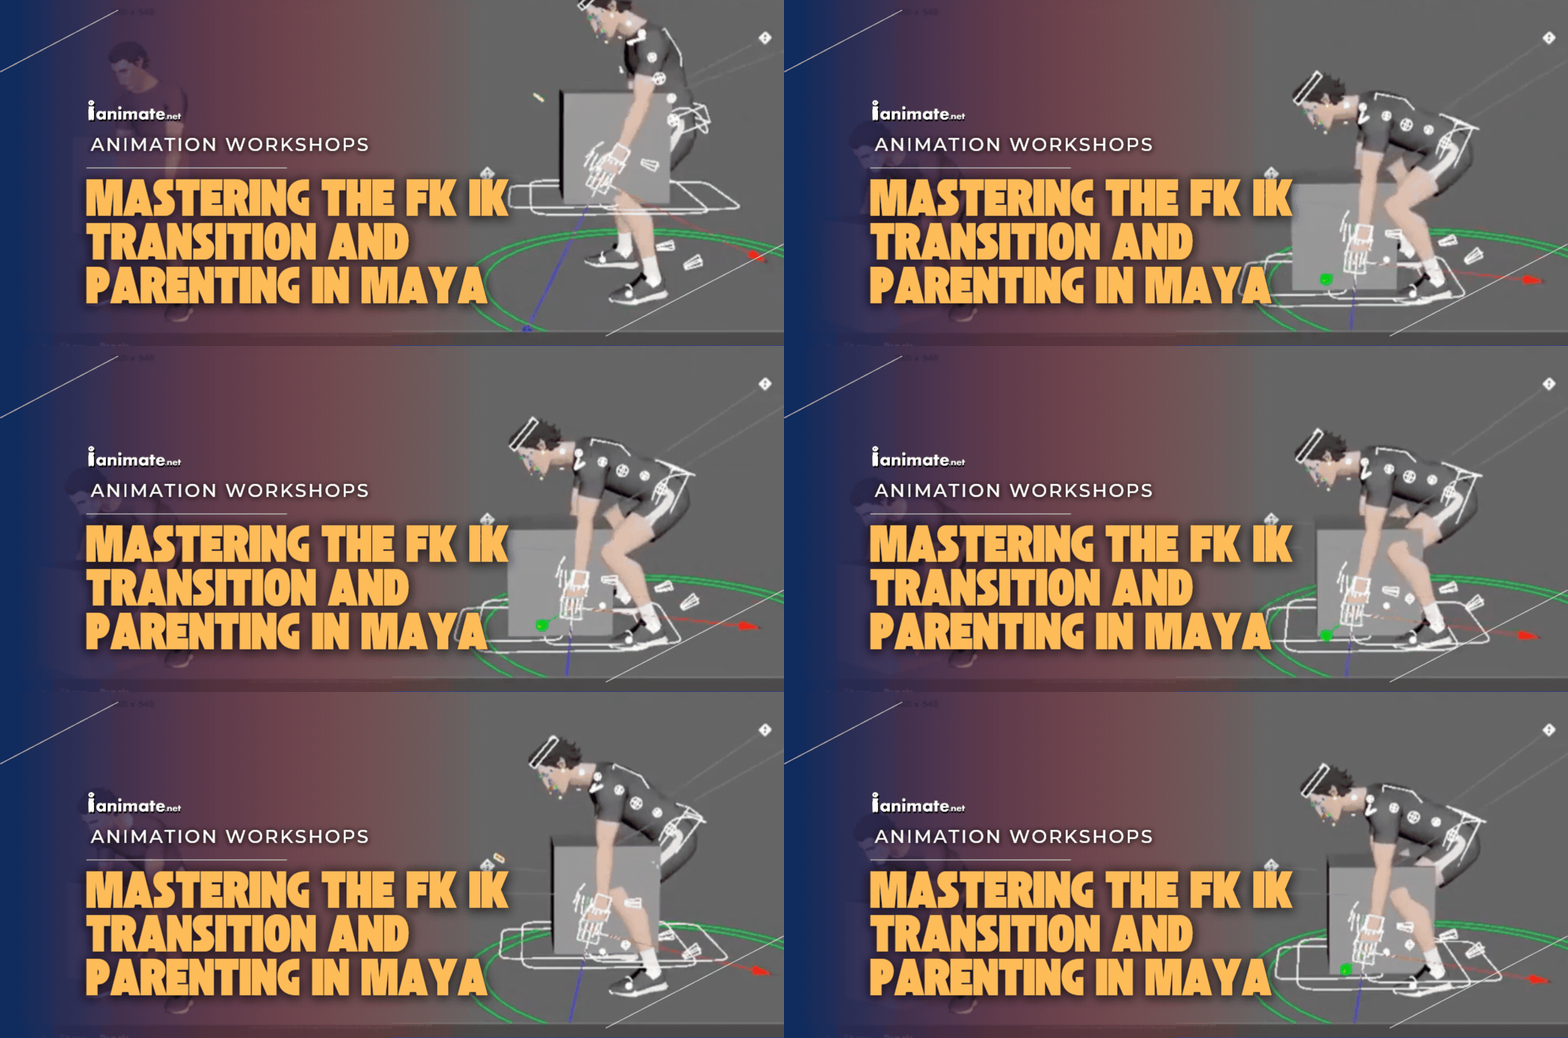
Mastering the FK IK Transition and Parenting in Maya
Learn how to manage FK IK transitions, parenting constraints, and clean animation curves in Maya using AnimBot and ZV Parent.
Article by Richard Arroyo & iAnimate Team, 2026-09-04
An FK IK transition is the process of blending forward and inverse kinematics on a character rig. Matching your poses perfectly before switching prevents distracting popping when hands interact with heavy props. This guide teaches clean parenting workflows using AnimBot.
Every animator has felt the creeping dread of a prop interaction. You have a character reaching for a heavy chest, a weapon, or a table, and suddenly your perfectly polished spline curves collapse into a mess of slipping hands, counter-animation, and popping elbows.
How do you transition your character's limbs between free-flowing movement and locked, constrained contact without breaking your physical spacing?
The secret lies in understanding how to bridge the gap between Forward Kinematics (FK) and Inverse Kinematics (IK), utilizing temporary parenting constraints, and structuring your timeline so that you retain complete artistic control. In this guide, we will break down the production-tested methods used by industry professionals to execute flawless IK FK blending and robust parenting setups.
In top-tier feature and game studios, directors expect animators to manage their own constraint hierarchies without altering the master rig file, making tools like AnimBot essential for daily production.
Why Weight Dictates Your FK IK Transition Strategy
The FK IK transition strategy for any given shot is fundamentally determined by the weight and physical influence of the object being handled. For heavy objects, placing hands in IK allows the object to drive the hand's placement seamlessly. Conversely, lightweight objects should be parented to an FK hand control so they naturally follow the character’s primary performance. (Source: iAnimate Feature Workshop 2, 2026)
When preparing to animate a prop interaction, you must first analyze the physical relationship between the character and the object. You cannot treat a heavy concrete block the same way you treat a plastic water bottle.
- Heavy Object Interactions: When a character interacts with a heavy, stable object—such as a large wooden crate, a heavy metal cube, or a desk—the hands must stay locked to the surface. To achieve this, your character's arms must be switched to
- Inverse Kinematics (IK): If they remain in Forward Kinematics (FK), you will spend hours manually counter-animating the shoulder, elbow, and wrist rotations to keep the hand from sliding off the object.
- Lightweight Prop Interactions: If your character is holding a light object like a pen, a small cup, or a smartphone, the hand drives the movement of the object. In this case, the arm should remain in Forward Kinematics (FK), and the prop should be parented directly to a hand or finger control.
- The Physics of Constraints: When a character grabs a heavy chair to pull themselves forward, the chair is stationary, and the character's body moves relative to the hands. In Autodesk Maya, setting the hands to IK and parenting those IK controls to the prop ensures that when the prop or the character's hips move, the hands maintain perfect contact with the surface.
Professional workflows show that failing to transition to IK on heavy props forces animators into an endless cycle of manual micro-positioning, which instantly reveals itself as "floaty" or sliding animation in final renders.
Snapping and Blending Without the Pop
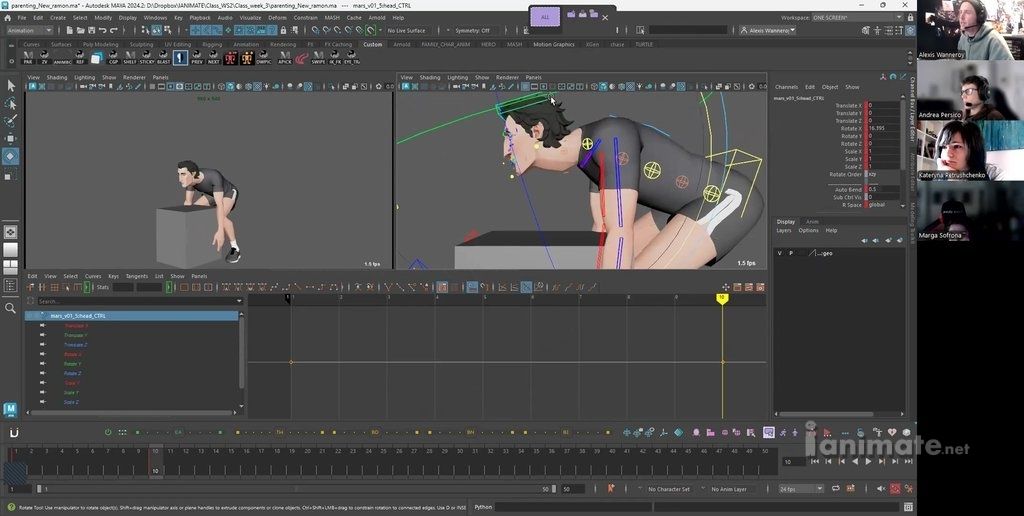
Seamless IK FK blending requires matching the spatial position of both control systems perfectly at the exact frame of the transition. Failing to snap the IK control to the corresponding FK joint results in visual popping and broken spatial arcs over the blending frames. Animators must match these poses on keyframes and allow the software to handle interpolation over tight, single-frame transitions. (Source: Autodesk, 2026)
The most common error in an FK IK transition is the "pop"—a sudden, single-frame jump where the hand shifts noticeably as the rig switches between systems. This occurs because the IK controller is sitting in a different spatial coordinate than the FK joint chain.
To prevent this, you must snap the systems together before executing the switch.
- Match the Coordinates: Before altering your blend attribute (often labeled IK/FK Blend or FK_IK), select your IK hand control and snap it directly to the FK wrist joint. Many modern studio rigs, such as the Ramon Riggs, feature built-in snapping scripts within their GUI pickers to automate this step.
- Set Your Keys Strategically: Do not spread your blend over ten frames. In feature film and gameplay animation, a physical switch should typically happen over a single frame. If you need a soft transition, limit the blend to a maximum of two to three frames, ensuring that both the IK and FK systems are animated along matching paths during those frames.
- Watch the Elbow Pole Vector: Snapping the wrist is only half the battle. You must also position the IK elbow pole vector so that the arm's plane of rotation matches the FK elbow's original position. If the pole vector is misaligned, the hand will stay in place during the switch, but the elbow will twist violently.
Experienced animators know that standard IK/FK matching scripts are highly rig-dependent; if a rig lacks an automated match tool, manually aligning the systems using locator constraints is a vital backup skill.
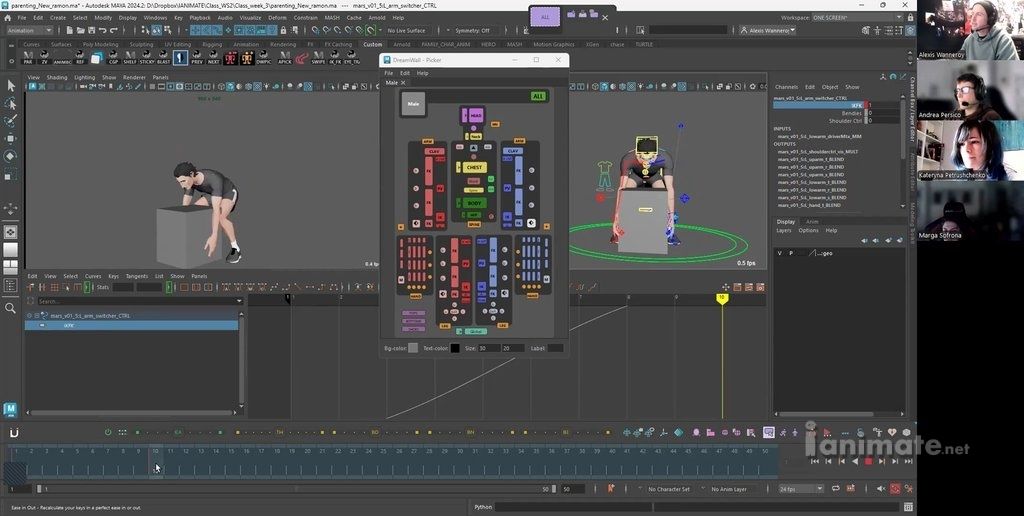
Step-by-Step: Setting Up AnimBot Simple Controls for Seamless Parenting
Setting up parenting constraints using AnimBot's Simple Control tool bypasses common Maya referencing and write-permission errors. By creating custom, temporary controls directly over referenced objects, animators can manipulate pivots and establish hierarchical relationships without modifying the source rig file. This ensures safe, flexible, and non-destructive prop manipulation in production environments. (Source: iAnimate Feature Workshop 2, 2026)
In production, you will often work with referenced rigs and props. Maya will frequently throw errors if you attempt to directly constrain or group these referenced nodes. To bypass this limitation, we use AnimBot to build custom, temporary parent controls.
Creating and Parenting Temporary Controls in Maya
- Select the Target Prop: Select the prop (e.g., the heavy cube) in your viewport.
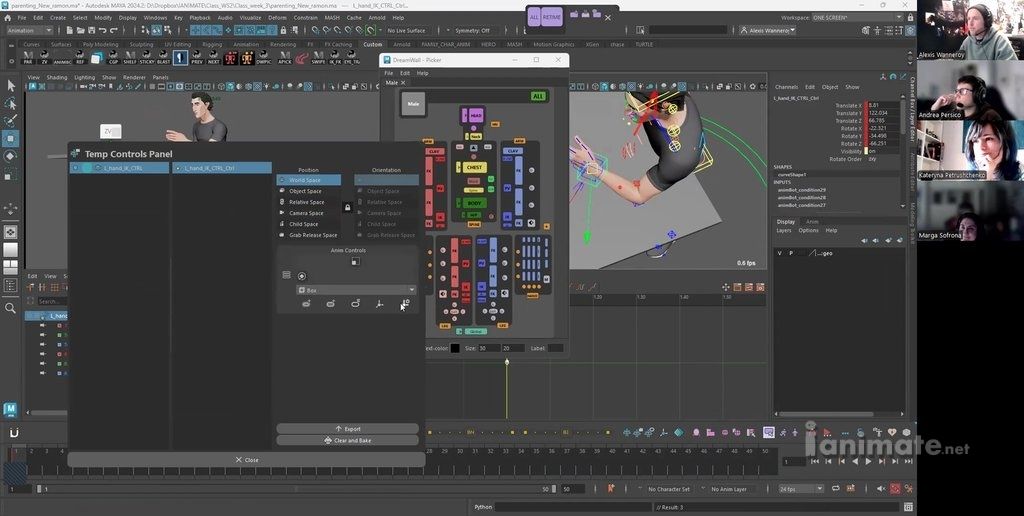
Generate the Simple Control: Click on the "Simple Control" button in your AnimBot toolbar. This generates a temporary, green controller aligned perfectly with your prop's pivot. - Adjust the Custom Pivot: If you need to pivot the prop from a specific corner (for example, rolling a heavy box), click the pivot symbol in the AnimBot Temp Control Panel. Move the pivot to the desired edge, and lock it back.
- Create Hand Controls: Select your character's IK hand controller, and click "Simple Control" in AnimBot. This places a temporary control directly over the hand.
- Establish the ZV Parent Constraint: Select the hand's temporary control, then select the prop's temporary control. Use the ZV Parent tool (or AnimBot's native parenting tool) to constrain the hand to the prop at the precise frame of contact.
- Bake and Clean Up: Once your animation is finalized and approved, select your temporary controls and click "Clear and Bake" to transfer all animation curves back to your base rig controls and delete the temporary setup safely.
This non-destructive temporary parenting workflow is a lifesaver when working on complex pipeline shots where directly constraining referenced rig nodes can corrupt scene files.
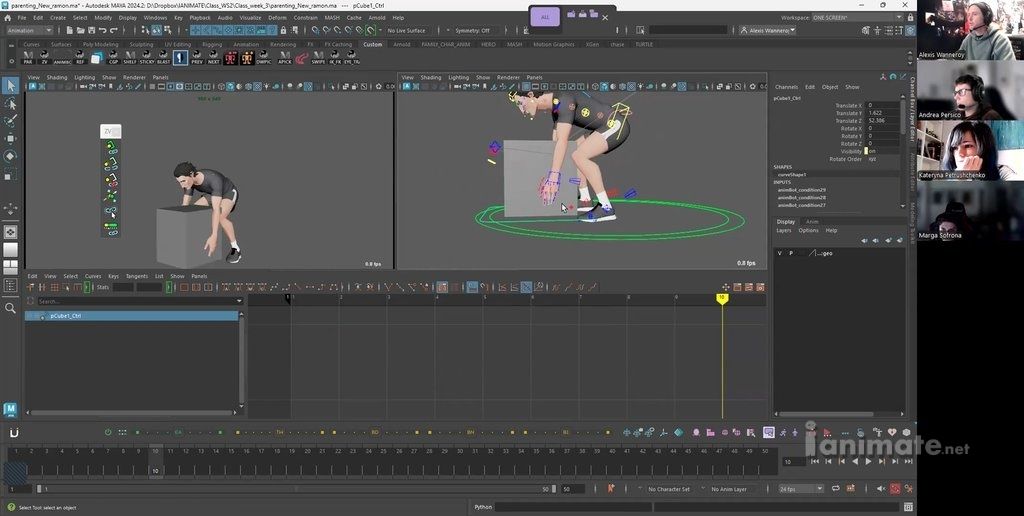
Animation Tips by Alexis Wanneroy
- Blending Duration: An FK IK transition should occur over 1 frame for fast actions, and a maximum of 3 frames for slow, deliberate grabs.
- Constraint Hierarchy Order: When using ZV Parent, always select the child control (the hand's temporary control) first, followed by the parent control (the prop).
- Retiming Safety: The "Retime" custom selection set must contain the whole character rig controls plus all constraint switch channels to prevent popping during timing passes.
Source: Alexis Wanneroy, iAnimate Feature Workshop 2, 2026
The Retiming Trap: Managing Constraints and Keys on the Timeline
Managing parenting constraints during a scene retiming pass requires grouping all constraint switch channels alongside your master character controls. If you shift keys on your character without shifting the corresponding constraint on/off steps, the hands will pop off their targets and float in world space. Animators must use a dedicated selection set to retime all elements uniformly. (Source: Autodesk, 2025)
You have set up your constraints, your FK IK transitions are perfectly matched, and your character lifts the prop beautifully. Then, your director asks you to make the lift twice as fast. You select your keys on the timeline, scale them down, and suddenly the hand pops off the prop, floating uselessly in space.
This is the classic "retiming trap."
- The Problem with Stepped Keys: Constraint switches (the attributes that turn parent constraints on or off) are stepped keys. They do not interpolate. If you move your character's animation keys but do not move the exact frame where the constraint toggles from 0 to 1, your animation and your constraints will fall out of sync.
- Creating a "Retime" Selection Set: To avoid this, select your entire character rig (the "All" control set) plus the temporary AnimBot parent controls and constraint switches. Save this group of objects as a custom selection set named "Retime".
- Keep Your Keys Clean: Never add regular animation keys to your "Retime" set. The "Retime" set is strictly used to select everything at once when you need to slide keys around on the timeline. Continue to use your standard "All" selection set for your regular pose building and curve polishing. This keeps your spline tangents clean and prevents unwanted sub-frame keys.
Keeping your constraint keys isolated from your main spline curves is standard practice under rigorous production schedules to keep files clean and readable for lighting and technical departments.
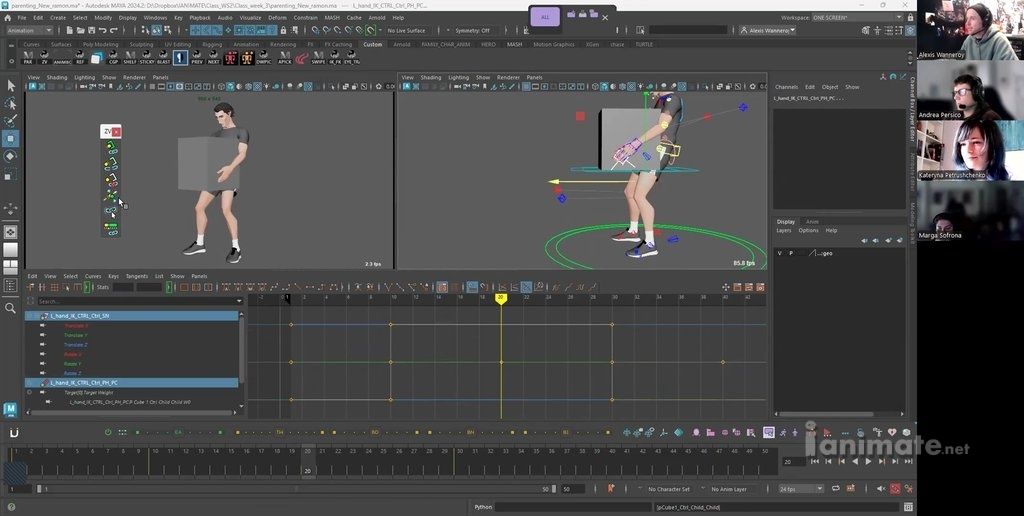
Advanced Rig Pinning: Elbows on Tables and Custom Pivots
Advanced rig pinning techniques, such as resting an elbow on a table, utilize pole vector constraints and custom space switches. By setting the arm's elbow pole vector to a global coordinate space, animators can lock the elbow's position while allowing the shoulder and chest to move. This creates realistic joint compression and physical weight distribution without joint slipping. (Source: iAnimate Feature Workshop 2, 2026)
Not all contact happens with the hands. Often, your character will rest their elbows on a table, lean their shoulder against a wall, or plant their knees on the ground.
These scenarios require advanced rig pinning setups to keep the joints stable.
- Pinning the Elbow: Most high-quality character rigs feature a "Pin Elbow" or pole vector space switch. When your character leans on a table, switch the elbow’s coordinate space from "Local" or "Body" to "Global". This pins the pole vector in world space, preventing the elbow from sliding as the chest rotates.
- Compensating with the Shoulder: Once your elbow is pinned to a table, any movement of the chest will pull on the collarbone. To make this contact feel natural, you must manually animate the shoulder control to compensate. As the chest pushes down, raise the shoulder control to create the visual illusion of joint compression and weight distribution.
- The Pivot Shift Trick: If your character is leaning their weight on a hand on a table, the hand shouldn't rotate from the wrist. Use AnimBot to move the temporary control's custom pivot to the palm or knuckles. This allows the character's hand to roll off the table naturally, driving the wrist and forearm rotations realistically.
Observing real-life reference is key here; when humans lean on a surface, the shoulder joint absorbs the chest's downward force. Translating this compression to your digital rig is what separates amateur work from professional performance.
"I gained hands-on experience with industry-standard animation workflows and received direct feedback from top professionals.”
Elevating Your Interactive Animation Workflow
Mastering the mechanics of an FK IK transition and temporary parenting constraints is what transforms floaty, unconvincing movement into weight-bearing, physical performances. By structuring your timeline cleanly, keeping your keys on uniform beats, and using non-destructive tools like AnimBot, you can tackle any complex prop interaction with confidence.
Don't let the fear of technical rig setups limit your physical performance choices. Practice building temporary controls, snapping your joint systems, and locking down your pivots so that your focus remains where it belongs—on the acting, the weight, and the physical truth of your character's performance.
Bottom line: Always match your FK and IK systems perfectly before switching, use temporary controls to handle referenced props, and retime your constraints and character keys together.
Frequently Asked Questions: FK IK Transition
Why does my arm pop on the exact frame I switch between FK and IK?
Your arm pops because the IK hand controller and the FK joint chain are in different spatial positions. To fix this, you must snap the IK controller to the FK joint (or vice versa) on the transition frame before turning the blend attribute on or off.
Should I blend my FK IK transition over multiple frames?
For most physical transitions, like grabbing or releasing a prop, a 1-frame switch is best. If the transition is very slow and gradual, you can blend it over 2 to 3 frames, but you must ensure both systems are closely matched during those frames to prevent sliding.
Why does Maya give me an error when I try to parent my character's hand to a prop?
This usually happens because the prop or the character rig is a referenced file, which limits your ability to create direct constraint nodes. Using AnimBot's "Simple Control" tool creates local, temporary controllers that bypass these referencing permissions safely.
How do I keep my hand from sliding off a table when the character's body moves?
Ensure the hand is in Inverse Kinematics (IK) and the hand's space switch is set to "Global" or "World." Additionally, if your rig has an elbow-pinning attribute, turn it on to lock the elbow joint's pole vector in space.
Can I retime my animation if I have parent constraints active in the scene?
Yes, but you must select both your character's controls and the constraint switch keys together. Creating a dedicated "Retime" selection set in AnimBot allows you to scale and shift keys uniformly without desynchronizing your constraint timing.
Written by iAnimate from Alexis Wanneroy’s F2 Workshop
Alexis Wanneroy is the Head of Character Animation at Fortiche Productions, where he led the animation team on Arcane Season 2 after serving as a supervisor on the award-winning first season. A former Supervising Animator at DreamWorks Animation, his credits include Kung Fu Panda, How to Train Your Dragon, Rise of the Guardians, and Kung Fu Panda 3, and he has been mentoring iAnimate students for over a decade.
Want to learn animation with Alexis? Apply to Feature Workshop now and start your journey.
Listen to Alexis Wanneroy’s latest podcast with iAnimate:
iAnimate instructors are elite industry professionals representing top-tier feature film and game studios worldwide. They bring years of practical, studio-tested knowledge to help elevate your animation skills.
🎯 Is This for You?
This post is for you if:
- Your character's hands slide or pop when grabbing or releasing props.
- You struggle with referenced rigs and Maya parenting errors during interactive scenes.
- You want to learn clean, professional workflows for managing constraints and timeline retiming.
📌 Key Takeaway
An FK IK transition is the process of blending forward and inverse kinematics on a character rig. Matching your poses perfectly before switching prevents distracting popping when hands interact with heavy props. This guide teaches clean parenting workflows using AnimBot.
About the Author
Richard Arroyo is a Creative Director and Content Director at Ubisoft Montreal, as well as a Partner and Manager at iAnimate, with a career spanning feature film, animation, television, and video games since 1999. He has directed on major titles including Skull & Bones, Watch Dogs Legion, and Rainbow Six Siege, and has helped shape iAnimate’s Games, Creature, Motion Capture, Rigging, and Pre-Visualization programs.